
This is the ninth part of the Flare-On 6 CTF WriteUp Series.
9 - reloaderd
The challenge reads
This is a simple challenge, enter the password, receive the key. I hear that it caused problems when trying to analyze it with ghidra. Remember that valid flare-on flags will always end with @flare-on.com
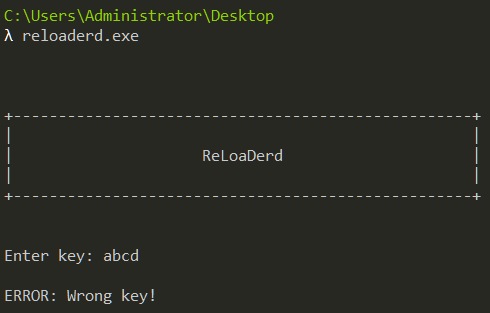
From a cursory look, this does look look like a simple challenge. Running the provided PE file reloaderd.exe prompts for a key.
Loading the binary in x64dbg we notice two calls from the main function.

The print_banner just prints the "ReLoaderd" banner. The remainder of the program logic is in the do_it function. The decompiled code of do_it in IDA looks like the following.
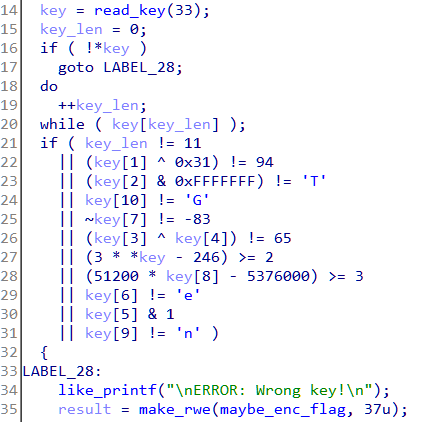
The program reads in a key of maximum 33 characters. Next we can see a series of checks on the key. The key length must be 11, key[1] xored with 0x31 must equal 94 and so on. This looks too simple to be the ninth challenge, but anyway let's calculate the key by reversing the constraints.
key[0] <= 82 'R'
key[1] = 94 ^ 0x31 = 111 'o'
key[2] = 84 'T'
key[3] ^ key[4] == 65
key[5] = even
key[6] = 101 'e'
key[7] = 82 'R'
key[8] <= 105 'i'
key[9] = 110 'n'
key[10] = 71 'G'
Most of the letters can be figured out statically with the exception of the third, fourth and fifth letter. With a little brute-force, the key comes out to RoT3rHeRinG. Using it as the key, the program does accept it but prints a flag which doesn't look right.

Getting to the real key check routine
What we analyzed till now was not the actual flag check code. Let's load the binary in Ghidra as the challenge description hints.
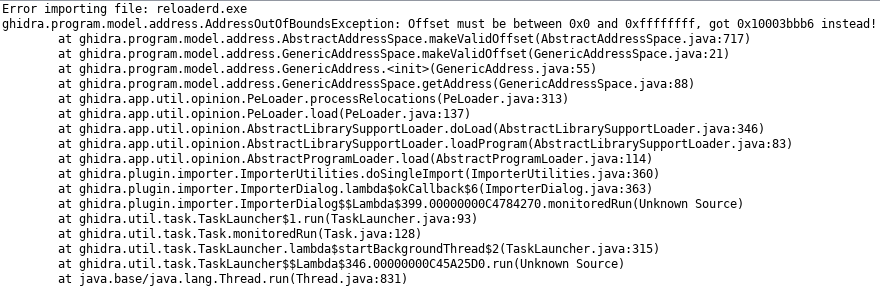
No luck either! Ghidra errors out with an exception which was expected. However if we look at the error closely we can find it crashed while trying to process relocations. May be the binary has something to do with relocations. If we use a PE analysis tool like PE Insider we can notice a strange characteristics of the binary. The preferred imagebase is at 0xFFFF0000.
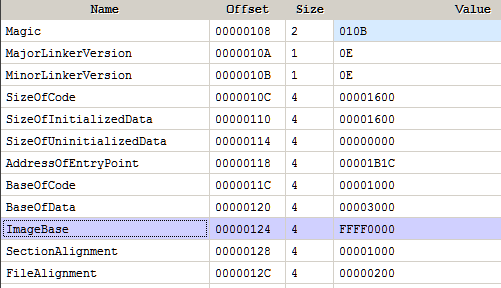
For regular 32-bit user mode processes any address above 2 GB (0x80000000) is invalid. Here the Image Base specified in the PE header is invalid. In such a case Windows loads the file at the fixed address of 0x10000. This can be used as an anti-debug technique and is well documented.
Since the binary can never be loaded at its preferred image base it has to be relocated. If we check the relocation directory we can find several relocation entries.
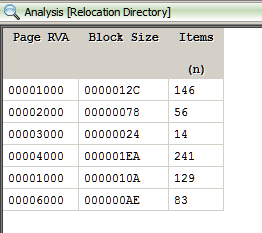
It's possible through the clever use of relocations the binary is patching itself at run-time. The code we are analyzing statically may not be the code that's executed. Let's re-debug the binary right from the entrypoint of the executable.
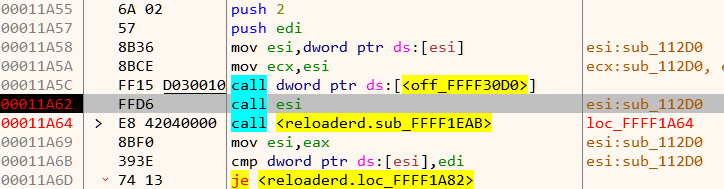
A few lines before it is about to call main we notice an indirect function call through the esi register. Stepping in we discover a hidden function not seen previously.
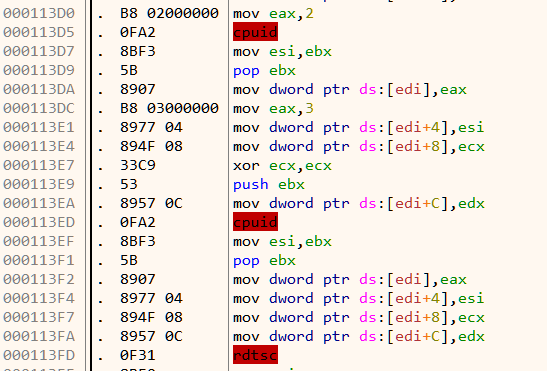
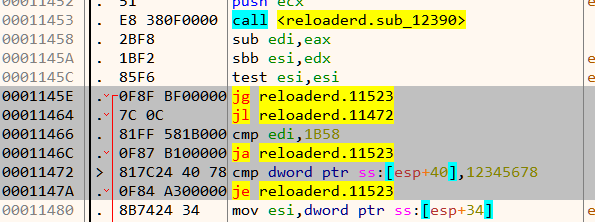
The presence of cpuid and rdtsc instructions indicate anti-debug code as seen in Figure 10.
To bypass the anti-debug we need to nullify a few jumps. In general, we need to nop all those jump instructions which jumps (indirectly or directly) to 11523 as shown in Figure 11 & Figure 12.
Getting the flag
Down below after bypassing the anti-debug we come across a piece of code which looks to be the place of the key check routine.
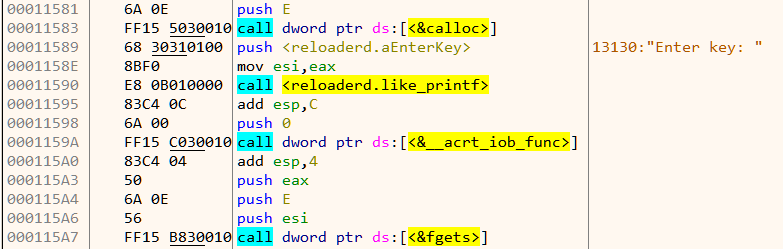
The code as shown in Figure 12 reads in an key of max size 14 chars via the fgets function.
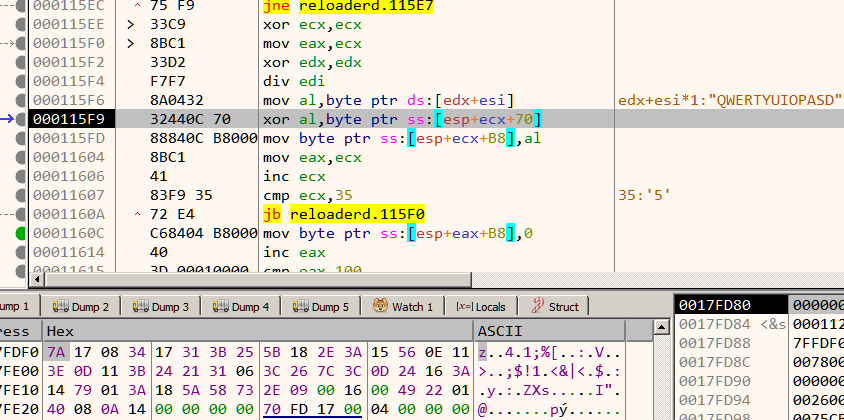
The input key is then xored with a buffer of length 0x35 in a cyclic fashion. If our key is correct the buffer must end with the string "@flare-on.com" as in Figure 14.
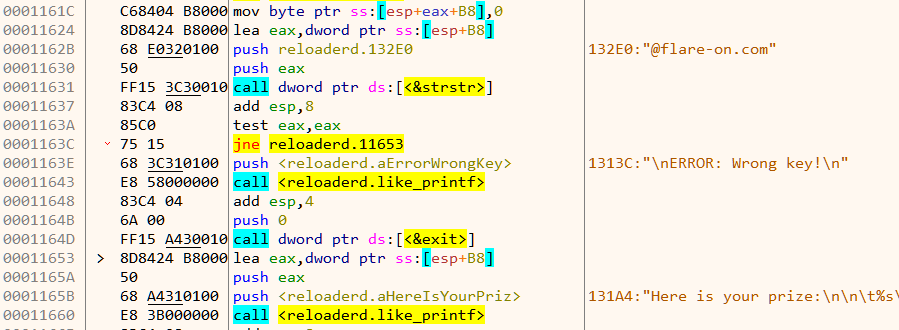
Using the obtained information so far, we can write a script to calculate the correct key. We know the buffer after xor must end with "@flare-on.com". Thus if we xor the encrypted buffer with the above string it should reveal the key.
target = '7A 17 08 34 17 31 3B 25 5B 18 2E 3A 15 56 0E 11 3E 0D 11 3B 24 21 31 06 3C 26 7C 3C 0D 24 16 3A 14 79 01 3A 18 5A 58 73 2E 09 00 16 00 49 22 01 40 08 0A 14 00'.split(' ')

target = list(map(lambda x:int(x, 16), target))
correct_end = b'@flare-on.com'[::-1]
key = bytearray()

for b in range(len(correct_end)):
	key.append(target[-2-b] ^ correct_end[b])

key = key[::-1]
print('key is:', str(key))
Running the script gives us the key 3HeadedMonkey and thus the flag.
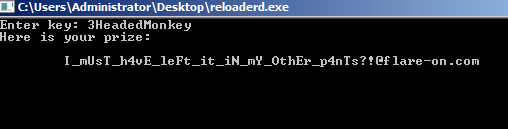
Flag: I_mUsT_h4vE_leFt_it_iN_mY_OthEr_p4nTs?!@flare-on.com


)
)
)